PowerShell How-To
How To Set Up an IIS Web Site on Windows Server Containers
Adam walks you through the process of setting up Windows containers and using them to run an IIS application.
- By Adam Bertram
- 11/20/2019
When you think of containers, it's easy to think of Linux first. Most containers and container workflows are built on Linux, and for obvious reasons. Linux starts faster, takes up less space on disk and doesn't have any licensing costs.
However, while Linux containers are the most popular, they are not the only kind of containers out there. Wouldn't it be cool to run Internet Information Services (IIS) in a container, as well?
Not all workflows were designed for Linux, and some applications could benefit from the modern patterns of containers and microservices but can't completely change architectures. Even those that can aren't necessarily maintained by teams that have the background knowledge to make them Unix-focused.
Enter Windows containers. Windows containers come in a few different varieties, the most popular being Nano Server and Server Core. Nano Server is the smallest version of Windows available, clocking in at just 256MB. This is a stripped-down version of Windows that has only the essentials necessary to run the operating system. Server Core is significantly larger at about 5GB, but has more tools and capabilities, including the IIS Web server feature.
Windows containers run through Docker for Windows, and are well-suited for migrating legacy systems and Web sites to containers. This means you can modernize a Windows application without needing to completely change how the application is built and deployed from the ground up. Depending on which features you require, one may fit your use case better than the other.
To follow along, you'll need the following:
- A Windows 10 or Windows Server 2019 physical device that supports virtualization.
- Docker for Windows installed.
Setting Up Your Device
The first thing you'll need to do is configure your device to allow containers to run on it. For Windows, this means having the Hyper-V and Containers features. Docker should prompt you to do this when you install it, but if you want to do it separately, you can enable it using PowerShell:
PS51> Enable-WindowsOptionalFeature -Online -FeatureName Microsoft-Hyper-V,Containers -All
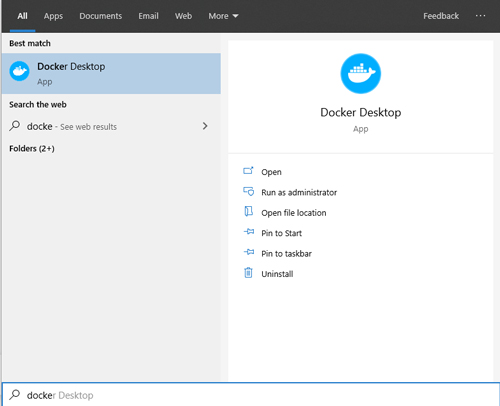
Once this is done, restart your device and run the Docker Desktop application.
 [Click on image for larger view.]
Docker will take a minute or so to start because it's setting up a Hyper-V image to run Linux containers that your Windows operating system can then access.
Switching Container Types
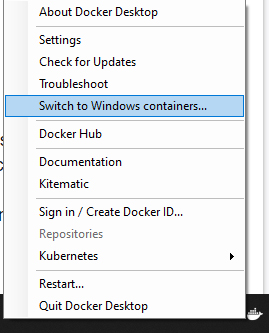
Linux is the default option on Docker Desktop, but you want to run a Windows container image, so the next step is to switch Docker over to use Windows containers. Right-click on the Docker icon in your system tray and select "Switch to Windows Containers."
Docker will ask if you are sure you want to switch. Once you confirm, it will start reconfiguring itself to run Windows containers. Now you're ready to run containers!
Running Your First Windows Container
Now that Docker for Windows is set up, you can download and run a Windows container from Docker Hub. Docker Hub is a public registry of container images that you can download and base your containers from. Different developers and organizations, including Microsoft, will maintain images that they allow the public to use. In this case, that means pulling the Server Core container image from Microsoft's page on Docker Hub. Run this command using an elevated command prompt or PowerShell terminal:
> docker run mcr.microsoft.com/windows/servercore:ltsc2019
 [Click on image for larger view.]
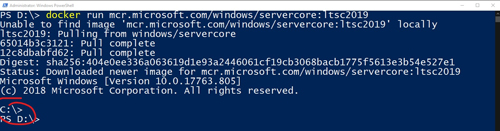
Docker will look locally for the image, and if it doesn't find it, will pull it and run any commands passed to it. In the screenshot above, you'll see that there is a blank CMD prompt using the C: drive at the bottom of the output, even though the PowerShell terminal is using the D: drive. When you run a container, it will take any commands passed to that container and run them before exiting the container. The prompt labeled *C:* in the screenshot above is actually referring to the C: drive inside the container.
 [Click on image for larger view.]
As seen above, you can pass commands to the container by including them after the run command.
Now that you have the container image and know how it's running, you can start customizing it with your own content and commands, including an IIS Web server.
Building the IIS Dockerfile
Now that you've downloaded the Server Core image in the last section, you are ready to build a Dockerfile. Think of a Dockerfile as a series of steps that you are giving the container to customize it. For the example in this column, you are going to take the following steps, and break them down step by step.
# escape=`
FROM mcr.microsoft.com/windows/servercore:ltsc2019
RUN powershell -Command `
Add-WindowsFeature Web-Server; `
Invoke-WebRequest -UseBasicParsing -Uri "https://dotnetbinaries.blob.core.windows.net/servicemonitor/2.0.1.6/ServiceMonitor.exe" -OutFile "C:\ServiceMonitor.exe"
EXPOSE 80
ENTRYPOINT ["C:\ServiceMonitor.exe", "w3svc"]
The first line, # escape=, tells Docker that when you build the container, treat any line after the backtick (`) character as the same line. It's not technically necessary, but it makes the Dockerfile much easier to read.
The second line, FROM mcr.microsoft.com/windows/servercore:ltsc2019, tells Docker to use the image you downloaded in the previous step as a base container in order to build this new container. The next line in the Dockerfile, which starts with RUN, is telling Docker to run some PowerShell commands that turn on the Web-Server Windows feature and download ServiceMonitor.exe, which IIS requires to run.
The next line of the Dockerfile, EXPOSE, is telling Docker to expose port 80 from the inside the container to the host operating system. That means that any traffic that would go on port 80 inside the container, like HTTP traffic from a Web server, will be accessible from outside of the container. Lastly, ENTRYPOINT is telling Docker what commands to run when starting the container. IIS, for example, requires ServiceMonitor.exe as an entry point process to run w3svc, the IIS service's name.
Now, to build the new container, copy that code and create a new folder (for example, *C:_site*) and save it in a new file called "Dockerfile." This is a specific name that Docker uses to list build instructions, including case, so the name has to be "Dockerfile," with a capital D. Finally, open a command prompt or a PowerShell terminal and enter the following:
> cd <The  location where the Dockerfile is>
> Docker build -t iis-demo .
> Docker run -d -p 8000:80 iis-demo
 [Click on image for larger view.]
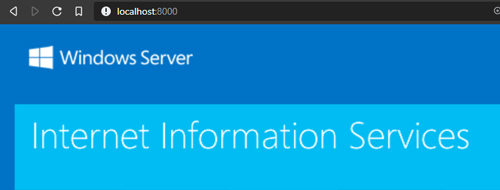
After a few minutes, the last command will finish and it'll look like nothing happened. However, if you navigate to localhost:8000 in any Web browser, you'll see something similar to the screenshot above. That page is from your IIS container. To add your own custom content, add two lines into the Dockerfile between the RUN and EXPOSE commands:
WORKDIR /inetpub/wwwroot
COPY content/ .
WORKDIR tells the container to make that location inside the container your working directory while it's building, and COPY allows you to take the contents of a folder and copy them in. The entire file will appear like this:
escape=`
FROM [mcr.microsoft.com/windows/servercore:ltsc2019](http://mcr.microsoft.com/windows/servercore:ltsc2019)
RUN powershell -Command Add-WindowsFeature Web-Server;
Invoke-WebRequest -UseBasicParsing -Uri "[https://dotnetbinaries.blob.core.windows.net/servicemonitor/2.0.1.6/ServiceMonitor.exe](https://dotnetbinaries.blob.core.windows.net/servicemonitor/2.0.1.6/ServiceMonitor.exe)" -OutFile "C:\ServiceMonitor.exe"
WORKDIR /inetpub/wwwroot
COPY content/ .
EXPOSE 80
ENTRYPOINT ["C:\ServiceMonitor.exe", "w3svc"]
Once you finish creating the content folder and rebuild the container with the new Dockerfile, you can run any content you like from your new IIS container.
Summary
Now that you know how to setup Windows containers and use them to run an IIS application, you can start containerizing your applications. This is a particularly useful way to take a legacy application and start refactoring it to work in the cloud, but you can do much more with it, as well. The possibilities are limitless, so have fun!
About the Author
Adam Bertram is a 20-year veteran of IT. He's an automation engineer, blogger, consultant, freelance writer, Pluralsight course author and content marketing advisor to multiple technology companies. Adam also founded the popular TechSnips e-learning platform. He mainly focuses on DevOps, system management and automation technologies, as well as various cloud platforms mostly in the Microsoft space. He is a Microsoft Cloud and Datacenter Management MVP who absorbs knowledge from the IT field and explains it in an easy-to-understand fashion. Catch up on Adam's articles at adamtheautomator.com, connect on LinkedIn or follow him on Twitter at @adbertram or the TechSnips Twitter account @techsnips_io.