PowerShell Pipeline
Adding a Certificate to a Store Using PowerShell
Usually the method for adding a certificate to a certificate store in Windows means that you perform one of a couple of actions, such as right-clicking on the certificate file and importing the certificate to a store or using the certificates MMC snap-in to import the certificate. Both ways get the job done, but we aren't the types of people to go about it that way, are we?
That's right, we are going with the PowerShell approach to make this happen! As with my previous article on exporting a certificate, I am going to show you two ways to import a certificate:
- Using the Import-Certificate cmdlet from the PKI module (or Import-PfxCertificate if using cert with private keys). Note: this is only available with PowerShell V4 and at least Windows 8.1/Windows Server 2012 R2
- Using .Net classes to import the certificate
Using Import-Certificate
The easiest way to accomplish this is by using the Import-Certificate cmdlet available in the PKI module. There are only a couple of parameters that mean anything to me:
- FilePath: Where the certificate file is located
- CertStoreLocation: The store where the certificate will be imported into. E.g. Cert:\LocalMachine\My
In this case, I am going to import one of my certificates to the LocalMachine\My store.
Import-Certificate -FilePath "C:\Users\proxb\Desktop\BackupCert.Cer" -CertStoreLocation 'Cert:\LocalMachine\My' -Verbose
 [Click on image for larger view.] Figure 1. Successful import of a certificate.
That was simple enough! The same approach could be used if you wanted to install a new Root CA certificate or any certificate for that matter as long as you know where it needs to go. If you have PowerShell remoting enabled in your environment (and each system is running PowerShell V4 along with being on Windows 8.1/Windows Server 2012 R2), then you could simply use copy the file to each system and use Invoke-Command to import the certificates. Of course, if you do not meet the criteria for using this command, then you are in luck as I will show you how to do this using the .Net classes with PowerShell!
.Net Approach
As with exporting a certificate, there is a little more work involved with importing a certificate (using a cmdlet makes it seems so easy, doesn't it?) and I will cover that in each step.
Let's start out by making the connection to a remote certificate store like, its 'Machine\My' store.
$Computername = "boe-pc"

  $CertStore = New-Object System.Security.Cryptography.X509Certificates.X509Store  -ArgumentList  "\\$($Computername)\My", "LocalMachine"

$CertStore.Open('ReadWrite')
I make sure to specify 'ReadWrite' with the open flag so I can actually write to the certificate store by adding the new certificate. I am also making sure to connect to the LocalMachine\My store, which will be where my certificate will be imported into.
$Certificate = New-Object System.Security.Cryptography.X509Certificates.X509Certificate2
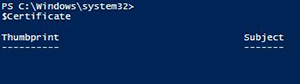 [Click on image for larger view.] Figure 2. Empty X509Certificate2 object.
I create an empty certificate object that can then be used along with the Import() method to load the data into the object and actually create a useful certificate. Before I use this method, let's take a look at the available overloads for this method.
$certificate.Import
OverloadDefinitions
  -------------------
  void Import(byte[] rawData)
  void Import(byte[] rawData, string password,  System.Security.Cryptography.X509Certificates.X509KeyStorageFlags  keyStorageFlags)
  void Import(byte[] rawData, securestring password,  System.Security.Cryptography.X509Certificates.X509KeyStorageFlags  keyStorageFlags)
  void Import(string  fileName)
  void Import(string fileName, string password,  System.Security.Cryptography.X509Certificates.X509KeyStorageFlags  keyStorageFlags)
void Import(string fileName, securestring password, System.Security.Cryptography.X509Certificates.X509KeyStorageFlags  keyStorageFlag
There are quite a few choices here that I can use with Import(). For this instance, I am going to use the overload that accepts a filepath to a certificate file. With that, I am going to import the .cer backup file that I have available.
$certificate.Import('"C:\Users\proxb\Desktop\BackupCert.Cer"')
Now we can look at the object and see what is in it now.
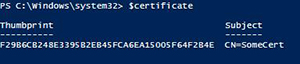 [Click on image for larger view.] Figure 3. Object is no longer empty.
Now that we have our certificate object ready to go, we can now add this certificate back into the store. With the Add() method on $CertStore, we only have one possible option to use.
$CertStore.Add
OverloadDefinitions

  -------------------

void  Add(System.Security.Cryptography.X509Certificates.X509Certificate2 certificate)
With that, we can now add the certificate:

  $CertStore.Add($certificate)
We can verify that the certificate is available in store by looking at the certifiates property on the certificate store object:
$CertStore.Certificates
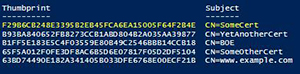 [Click on image for larger view.] Figure 4. SomeCert is now available in the store.
With that, we have now added a certificate to a remote store. We could change this up if we wanted to just like when I showed the cmdlet approach to this by adding certificates to other stores such as the Trusted Root Certification Authorities store. In fact, I wrote a small function that would make pushing out a new certificate to multiple systems much easier.
Function Import-Certificate  {

  <#

  .SYNOPSIS

  Import  a certificate from a local or remote system.

  .DESCRIPTION

  Import  a certificate from a local or remote system.

  .PARAMETER  Computername

  A  single or  list of computernames to  perform search against

  .PARAMETER  StoreName

  The  name of  the certificate store name that  you want to search

  .PARAMETER  StoreLocation

  The  location  of the certificate store.

  .NOTES

  Name:  Import-Certificate

  Author:  Boe  Prox

  Version  History:

  1.0  -  Initial Version

  .EXAMPLE

  $File =  "C:\temp\SomeRootCA.cer"

  $Computername = 'Server1','Server2','Client1','Client2'

  Import-Certificate -Certificate $File -StoreName Root -StoreLocation  LocalMachine -ComputerName $Computername


  Description

  -----------

  Adds  the SomeRootCA certificate to the Trusted Root Certificate Authority store on  the remote systems.

  #>

  [cmdletbinding(

  SupportsShouldProcess=$True

  )]

  Param (

  [parameter(ValueFromPipeline=$True,ValueFromPipelineByPropertyName=$True)]

  [Alias('PSComputername','__Server','IPAddress')]

  [string[]]$Computername =   $env:COMPUTERNAME,


  [parameter(Mandatory=$True)]

  [string]$Certificate,

  [System.Security.Cryptography.X509Certificates.StoreName]$StoreName =  'My',

  [System.Security.Cryptography.X509Certificates.StoreLocation]$StoreLocation  = 'LocalMachine'

  )

  Begin {

  $CertificateObject = New-Object  System.Security.Cryptography.X509Certificates.X509Certificate2

  $CertificateObject.Import($Certificate)

  }

  Process  {

  ForEach  ($Computer in  $Computername) {

  Try  {

  Write-Verbose  ("Connecting to {0}\{1}" -f  "\\$($Computername)\$($StoreName)",$StoreLocation)

  $CertStore  = New-Object   System.Security.Cryptography.X509Certificates.X509Store  -ArgumentList  "\\$($Computername)\$($StoreName)", $StoreLocation

  $CertStore.Open('ReadWrite')

  If  ($PSCmdlet.ShouldProcess("$($StoreName)\$($StoreLocation)","Add  $Certificate")) {

  $CertStore.Add($CertificateObject)

  }

  }  Catch  {

  Write-Warning  "$($Computer): $_"

  }

  }

  }

  }
Using the example below, I can easily push out a certificate to a few remote systems.
$File = "C:\temp\SomeRootCA.cer"

  $Computername = 'Server1','Server2','Client1','Client2'

Import-Certificate -Certificate $File -StoreName Root  -StoreLocation LocalMachine -ComputerName $Computername
As I mentioned previously, this is a simple function that doesn't do anything more than adding a regular certificate to a store. It doesn't handle passwords or certificates with a private key. With that, we can wrap up this article on adding certificates to a certificate store.
About the Author
Boe Prox is a Microsoft MVP in Windows PowerShell and a Senior Windows System Administrator. He has worked in the IT field since 2003, and he supports a variety of different platforms. He is a contributing author in PowerShell Deep Dives with chapters about WSUS and TCP communication. He is a moderator on the Hey, Scripting Guy! forum, and he has been a judge for the Scripting Games. He has presented talks on the topics of WSUS and PowerShell as well as runspaces to PowerShell user groups. He is an Honorary Scripting Guy, and he has submitted a number of posts as a to Microsoft's Hey, Scripting Guy! He also has a number of open source projects available on Codeplex and GitHub. His personal blog is at http://learn-powershell.net.