PowerShell How-To
Creating Volume Shadow Copies in PowerShell
PowerShell can help to create automated snapshots for those times that things go wrong.
- By Adam Bertram
- 12/07/2015
Ever deleted a file or folder on a file server and didn't mean to? Yea, me neither. But if you did, what would you do about it? Maybe you'd break out the backup tape or perhaps perform the restore from some other third-party application. But what if you didn't have to? Using Volume Shadow Copy or Volume Snapshot Service (VSS) you don't have to. Once enabled, VSS allows you to simply right-click on a file or folder and easily roll back any changes to a previous state.
VSS is a useful tool to easily revert your files and folders to a previous version from the GUI by using shadow copies. Sometimes, however, using the GUI isn't the best approach. There comes a time in any IT professional's life where you either need to use the command line to manage things or roll those commands into a bigger script. When talking about Windows, the scripting language would be PowerShell.
Let's see how you can create shadow copies from PowerShell. But first, you'll have to ensure VSS is enabled on the volume. To do this, right-click on the volume and go to Properties and then click on the Shadow Copies tab. This will bring you to a window where you can then click on Enable to create the first snapshot.
 [Click on image for larger view.] Figure 1.
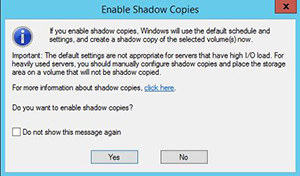
You are then presented with a confirmation box where you can then click Yes. That's it! You now have VSS enabled on your volume.
 [Click on image for larger view.] Figure 2.
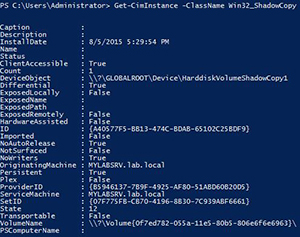
Once you've got VSS enabled on the volume you are now able to manage those shadow copies via PowerShell. These shadow copies are exposed to PowerShell by a WMI class called Win32_ShadowCopy. This is a class that contains information about each shadow copy as well as providing a few ways to create new snapshots and revert those snapshots.
If you simply want to see all of the shadow copies currently created you query all of the instance of the Win32_ShadowCopy class. When you do this, you'll see all of the shadow copies with all of the properties available.
 [Click on image for larger view.] Figure 3.
Not only can you just see the shadow copies you can also create shadow copies as well through the Create() WMI method. In the below screenshot I'm creating a new snapshot on the C:\ volume.
 [Click on image for larger view.] Figure 4.
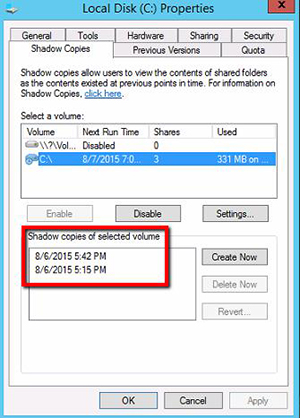
You'll see that the return value is 0 which means if it was successful. If I then want to ensure that it got created I could then run Get-CimInstance Win32_ShadowCopy again or I could check the GUI.
 [Click on image for larger view.] Figure 5.
During my testing it only took a few seconds to create a snapshot. Using PowerShell is a create way to create VSS snapshots and you can see that it's very easy to do. Use this method the next time you need a way to create snapshots in an automated fashion.
About the Author
Adam Bertram is a 20-year veteran of IT. He's an automation engineer, blogger, consultant, freelance writer, Pluralsight course author and content marketing advisor to multiple technology companies. Adam also founded the popular TechSnips e-learning platform. He mainly focuses on DevOps, system management and automation technologies, as well as various cloud platforms mostly in the Microsoft space. He is a Microsoft Cloud and Datacenter Management MVP who absorbs knowledge from the IT field and explains it in an easy-to-understand fashion. Catch up on Adam's articles at adamtheautomator.com, connect on LinkedIn or follow him on Twitter at @adbertram or the TechSnips Twitter account @techsnips_io.