PowerShell How-To
How To Display GUI Message Boxes in PowerShell
Create custom prompt boxes in minutes with a little PowerShell and .NET knowledge.
- By Adam Bertram
- 06/09/2016
A lot of people think that PowerShell is simply a command line language. They believe that the only thing PowerShell can do is output text to a boring console screen. Au contraire, my friend! Since PowerShell is built on top of the .NET framework, it has the power to use just about anything that your traditional VB.NET or C# developer can do. That includes building graphical user interfaces (GUIs) for your scripts!
A couple of different ways exist to transform your scripts into GUI form. If you need to create real GUI tools to interact with the user in PowerShell you're probably going to choose either Windows Forms (WinForms) or Windows Presentation Foundation (WPF).However, there are times when you don't need to go to the extent of building fully-featured GUI tools. For example, you wouldn't want to figure out how to make forms and place controls on your forms when you only want to display a message to your user for general information or to get some kind of simple input. In this case, there's another simpler method that only requires a single line of code; [System.Windows.MessageBox].
The MessageBox class in the System.Windows namespace has a multitude of options that allow you to simply show the user some text with an OK button all the way to asking for input and giving them options like Yes/No/Cancel. Let's dive into how we can make this handy class work for us.
First of all, this namespace does not exist by default in PowerShell. To use it, you'll need to add the assembly into your PowerShell session. You'll do this by adding the PresentationFramework assembly by using the Add-Type cmdlet.
Add-Type -AssemblyNamePresentationFramework
Once this is done, we can now use the MessageBox class.
The MessageBox class has one primary method called Show. It is this method that you can pass some different parameters to it to make it behave differently. For example, in its simplest form, you can use the Show() method to display a simple message.
[System.Windows.MessageBox]::Show('Hello')
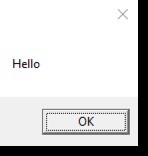 Figure 1.
You'll notice when the message box comes up, it will halt your console input until it's closed. When you click OK, the console will then show you what the Show() method returned, which, in this case, is simple 'OK.'
 [Click on image for larger view.] Figure 2.
But the Show() method can do so much more. The Show() method has many different constructors you can use to customize things like the message box title, the type of buttons displayed and so on. Let's go over one more example. This time, we'll add a title, an icon and instead of just the OK button, we'll add Yes/No/Cancel buttons to get different kinds of input from the user.
To do this, I'll add a few parameters to the Show() method.
[System.Windows.MessageBox]::Show('Would you like to play a game?','Game input','YesNoCancel','Error')
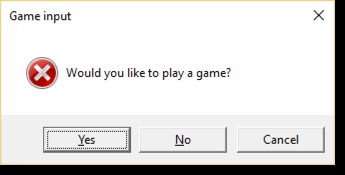 Figure 3.
You can see that as long as I place the message, the message box title, the button set and the type of icon to be displayed in the right parameter order I can show different kinds of message boxes. Then, depending on the button that I press, it will return a particular output that you can then use to make a decision on the future flow of your script.
Here I've created three message boxes and clicked on each of the buttons. Notice that either a Yes, No or Cancel string is always returned.
 [Click on image for larger view.] Figure 4.
This can then lead to a script that might look something like this:
$msgBoxInput =  [System.Windows.MessageBox]::Show('Would you like to play a game?','Game  input','YesNoCancel','Error')

  switch  ($msgBoxInput) {

  'Yes' {

  ## Do something

  }

  'No' {

  ## Do something

  }

  'Cancel' {

  ## Do something

  }

  }
You've now seen how to use the MessageBox .NET class with PowerShell. It's now up to you to implement this feature into your scripts to create a graphical and interactive way of sending information to and getting input from the script user.
About the Author
Adam Bertram is a 20-year veteran of IT. He's an automation engineer, blogger, consultant, freelance writer, Pluralsight course author and content marketing advisor to multiple technology companies. Adam also founded the popular TechSnips e-learning platform. He mainly focuses on DevOps, system management and automation technologies, as well as various cloud platforms mostly in the Microsoft space. He is a Microsoft Cloud and Datacenter Management MVP who absorbs knowledge from the IT field and explains it in an easy-to-understand fashion. Catch up on Adam's articles at adamtheautomator.com, connect on LinkedIn or follow him on Twitter at @adbertram or the TechSnips Twitter account @techsnips_io.