PowerShell How-To
Creating Your First Repository on GitHub
GitHub provides you an easy way to store and test your useful code.
- By Adam Bertram
- 08/08/2016
If you're not a software developer, you may have never heard of the term 'source control' before. Although increasingly not as common as it once was, source control is typically a topic more destined for a software creator rather than a software consumer like many operations folks are. But, as operations is increasingly being pressured to do more with less and with many businesses hopping on the DevOps train, operations are increasingly having to automate, automate, automate. The best way to do this is through code, and when you have code, you're going to have source control.
Without going into an in-depth look at source control, in a nutshell, it's simply a way of controlling all of the changes that happen in code. One of the most popular source control products out there today is Git. Git allows developers (and some of you operations scripters) to check in on your code on a periodic basis to essentially create a snapshot in time of where your code is. Then, when you screw it up, you can easily revert it back to a working state.
Git is great if you're working by yourself but what if you want to share your code with others? Perhaps you'd like to contribute to open source projects collaborating with many other developers? This is when you'd need to look into using GitHub. Think of Github as a social Git. It's a way of extending Git's version control ability to many people at once. When you start using Github, one of your first tasks will be to setup a repository. A repository is simply a container that lives in your local Git instance and can be synced to GitHub.
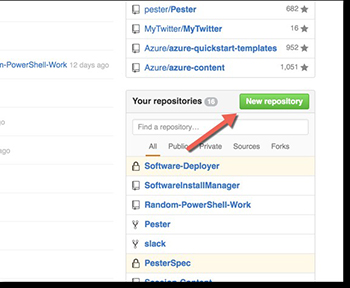
In this article, let's go over setting up your first GitHub repository. But first, I'm going to assume you already have a Github subscription set up. If not, go ahead and create one. They're free. Once you've got your Github subscription set up, log in with your credentials, and you should see a bright green button called New Repository along the right-hand side of your screen. Click that.
 [Click on image for larger view.] Figure 1.
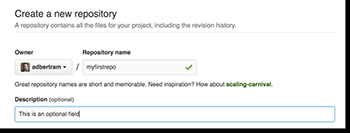
Once that loads, you're then presented with a single screen to set up everything you need to create your first repository. The first box is your repository name. This can be anything you'd like. Below you can see I called mine myfirstrepo. You can see that it's available by the green check to the right. Next, I've chosen to fill in the description. This is optional but recommended especially if you plan to have others contribute and download code from your repository.
 [Click on image for larger view.] Figure 2.
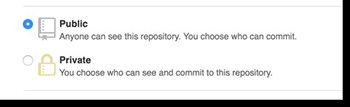
Next, you'll have to choose between a public or private repository. If you choose public, anyone on Github can see your repository and all code therein. You can create as many public repositories as you'd like for free. However, choosing private which hides your code from others, will cost you, at minimum $7/month for up to five repositories.
 [Click on image for larger view.] Figure 3.
Next is the readme, .gitignore file and the license. Although not required, I recommend going through this step. The README is a summary of what your repository does, how to use the code inside, prerequisites to use it and any other information you'd like. It will show up front and center on your repository's front page.
Also, in this section is the .gitignore file. Although you probably won't use this for your first repository, it will be necessary to exclude certain files from syncing to your Github repository. You'll find that certain files will eventually manage to creep into the folder your repository is in on your local computer, but you'd rather not get committed to your Git repository. You'd put these file names in the .gitignore file.
Finally, is the license. Again, although not required, it's super easy to do and may save you a lot of grief down the road if your code got popular and used by many people. If you don't know which license to apply, GitHub has created an easy-to-understand page you can view by clicking on the small information icon just to the right of the button.
 [Click on image for larger view.] Figure 4.
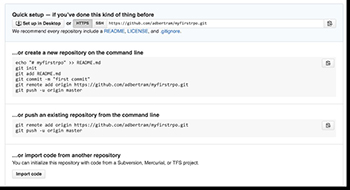
Once you've got all this information filled out and submitted your repository has been created! Because GitHub is an extension of Git, you'll now need to create your local Git repository and sync it with your Github repository. But that's for another day.
 [Click on image for larger view.] Figure 5.
Now you have no excuse for overwriting those scripts and losing your work! Even if you're not a developer, use source control to check in your scripts. You'll find that it's an activity you should have started a long time ago.
About the Author
Adam Bertram is a 20-year veteran of IT. He's an automation engineer, blogger, consultant, freelance writer, Pluralsight course author and content marketing advisor to multiple technology companies. Adam also founded the popular TechSnips e-learning platform. He mainly focuses on DevOps, system management and automation technologies, as well as various cloud platforms mostly in the Microsoft space. He is a Microsoft Cloud and Datacenter Management MVP who absorbs knowledge from the IT field and explains it in an easy-to-understand fashion. Catch up on Adam's articles at adamtheautomator.com, connect on LinkedIn or follow him on Twitter at @adbertram or the TechSnips Twitter account @techsnips_io.