PowerShell Pipeline
Creating Shares in Windows Using the SmbShare Module in PowerShell
Just recently, Microsoft has made it a lot easier to create new shares by avoiding cumbersome UI navigation and going straight through PowerShell.
Working with Windows shares, you can easily create a location for others to use to store data using a simple share name that could map several folders down in a server (or client). This allows for better simplicity of gaining access to these resources for all users. For the longest time, the best way to create a share was going through the UI by clicking on a folder, and going through the motions to create a share on the folder and then assign the proper share permissions for the newly created resource.
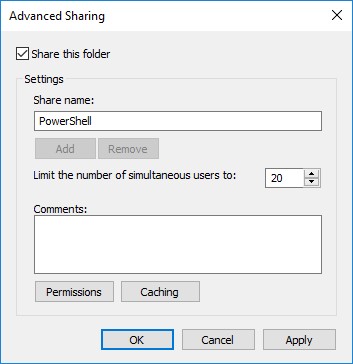 [Click on image for larger view.] Figure 1.
PowerShell was able to be used as well in this, but you had to have some knowledge of WMI and being able to properly create the share and ensure that you picked the right type of share (disk in this case). This wasn't exactly user friendly as the method to create the share required an integer to represent the type of share. So if you didn't know the right number for a disk share (it's 0), then you might find yourself on the receiving end of errors or looking up the proper number to create the right kind of share. Adding users or groups to the share permissions is another thing all together. Working with the proper access type (yes, more integers to work with here) as well as creating the acceptable trustee format will make you wish for an easier approach to all of this.
Fortunately, starting with Windows 8/Windows Server 2012 and PowerShell V3, we have the SMBShare module, which is now built in to Windows for easier creation of shares and assigning permissions compared to using legacy WMI approaches and makes automating the share creation process quicker than working through the UI.
Let's take a look at all of the commands that come with the SMShare module.
Get-Command -Module  SMBShare |

  Format-Wide Name  -Column 2
Block-SmbShareAccess                         Close-SmbOpenFile

  Close-SmbSession                              Disable-SmbDelegation

  Enable-SmbDelegation                          Get-SmbBandwidthLimit

  Get-SmbClientConfiguration                    Get-SmbClientNetworkInterface

  Get-SmbConnection                             Get-SmbDelegation

  Get-SmbMapping                                Get-SmbMultichannelConnection

  Get-SmbMultichannelConstraint                Get-SmbOpenFile

  Get-SmbServerConfiguration                    Get-SmbServerNetworkInterface

  Get-SmbSession                               Get-SmbShare

  Get-SmbShareAccess                            Grant-SmbShareAccess

  New-SmbMapping                                New-SmbMultichannelConstraint

  New-SmbShare                                 Remove-SmbBandwidthLimit

  Remove-SmbMapping                             Remove-SmbMultichannelConstraint

  Remove-SmbShare                               Revoke-SmbShareAccess

  Set-SmbBandwidthLimit                         Set-SmbClientConfiguration

  Set-SmbPathAcl                                Set-SmbServerConfiguration

  Set-SmbShare                                  Unblock-SmbShareAccess

  Update-SmbMultichannelConnection
The cmdlets that I am focusing on to create the share are New-SmbShare and Grant-SmbShareAccess. These will allow me to create a new share and adding more users/groups to the share for access. First, we should look at the help documentation for New-SmbShare and see what kind of parameters we have to work with.
Get-Help New-SmbShare
NAME

  New-SmbShare


  SYNOPSIS

  Creates an SMB  share.


  SYNTAX

  New-SmbShare  [-Name] <String> [-Path] <String> [[-ScopeName] <String>]  [-CachingMode {None | Manual |

  Documents |  Programs | BranchCache | Unknown}] [-CATimeout <UInt32>] [-ChangeAccess  <String[]>]

  [-CimSession  <CimSession[]>] [-ConcurrentUserLimit <UInt32>]  [-ContinuouslyAvailable <Boolean>]

  [-Description  <String>] [-EncryptData <Boolean>] [-FolderEnumerationMode  {AccessBased | Unrestricted}]

  [-FullAccess  <String[]>] [-NoAccess <String[]>] [-ReadAccess <String[]>]  [-SecurityDescriptor

<System.String>] [-Temporary] [-ThrottleLimit <Int32>]  [-Confirm] [-WhatIf] [<CommonParameters>]
The parameters that stick out here are the following:
- Name: Set the name of the share.
- Path: The full path to where the share will map to.
- FullAccess|NoAccess|ReadAccess: This sets the type of access that will be allowed for the specified account or accounts with the parameter.
With this knowledge, I will create a share on the PowerShell folder located on C:\PowerShell and give an account full access to the share. It is important to note that you need to be running your console "as an administrator" in order for the share to be created.
New-SmbShare -Name PowerShellFiles -Path  C:\PowerShell -FullAccess  'prox-pc\smithb'

  -ReadAccess 'prox-pc\testuser'  -Verbose
Name             ScopeName Path           Description

  ----             --------- ----           -----------

  PowerShellFiles *          C:\PowerShell
We can see from the object that has been sent to the console that our share was successfully created. Maybe I forgot to add a group to the share for one reason or another. No problem! I will just use the Grant-SmbShareAccess cmdlet to add the missing group.
Get-Help Grant-SmbShareAccess
NAME

  Grant-SmbShareAccess


  SYNOPSIS

  Adds an allow ACE  for a trustee to the security descriptor of the SMB share.


  SYNTAX

  Grant-SmbShareAccess [-AccessRight {Full | Change | Read | Custom}]  [-AccountName <String[]>]

  [-CimSession  <CimSession[]>] [-Force] [-ThrottleLimit <Int32>] [-Confirm]  [-WhatIf] [<CommonParameters>]


  Grant-SmbShareAccess [-Name] <String[]> [[-ScopeName]  <String[]>] [-AccessRight {Full | Change | Read |

  Custom}]  [-AccountName <String[]>] [-CimSession <CimSession[]>] [-Force]  [-SmbInstance {Default | CSV}]

[-ThrottleLimit  <Int32>] [-Confirm] [-WhatIf] [<CommonParameters>]
I'm only focused on the Name, AccessRight and Accountname parameters here to get the job done.
Grant-SmbShareAccess -Name PowerShellFiles -AccountName 'prox-pc\proxb' -AccessRight Read -Confirm:$False
Name             ScopeName AccountName       AccessControlType AccessRight

  ----             --------- -----------       ----------------- -----------

  PowerShellFiles *          PROX-PC\smithb   Allow             Full

  PowerShellFiles *          PROX-PC\testuser Allow              Read

PowerShellFiles *          PROX-PC\proxb    Allow             Read
The resulting output is not only the recently added account, but the rest of the accounts which have access to the share as well. And like that, we have created a new share in Windows as well as adding granting another account access to the share in just a few lines of code! You can now take this knowledge and begin the process of easily automating your share creations using PowerShell and the SmbShare module.