Prof. Powershell
HTML Bits and Pieces, Part 1
Create a nice, formatted report via the ConvertTo-HTML cmdlet and a bit of formatting trickery to make the report easier on the eyes.
- By Jeffery Hicks
- 11/06/2012
One of the handiest cmdlets in PowerShell, especially when it comes to report generation, is ConvertTo-HTML. This cmdlet will take any object you pipe to it and create an html table. Technically the cmdlet creates the HTML code to create the table. You need to pipe to Out-File to save the result:
PS C:\> Get-Service | ConvertTo-HTML | Out-File c:\work\MyServices.htm
Unfortunately, you'll end up with something like Figure 1.
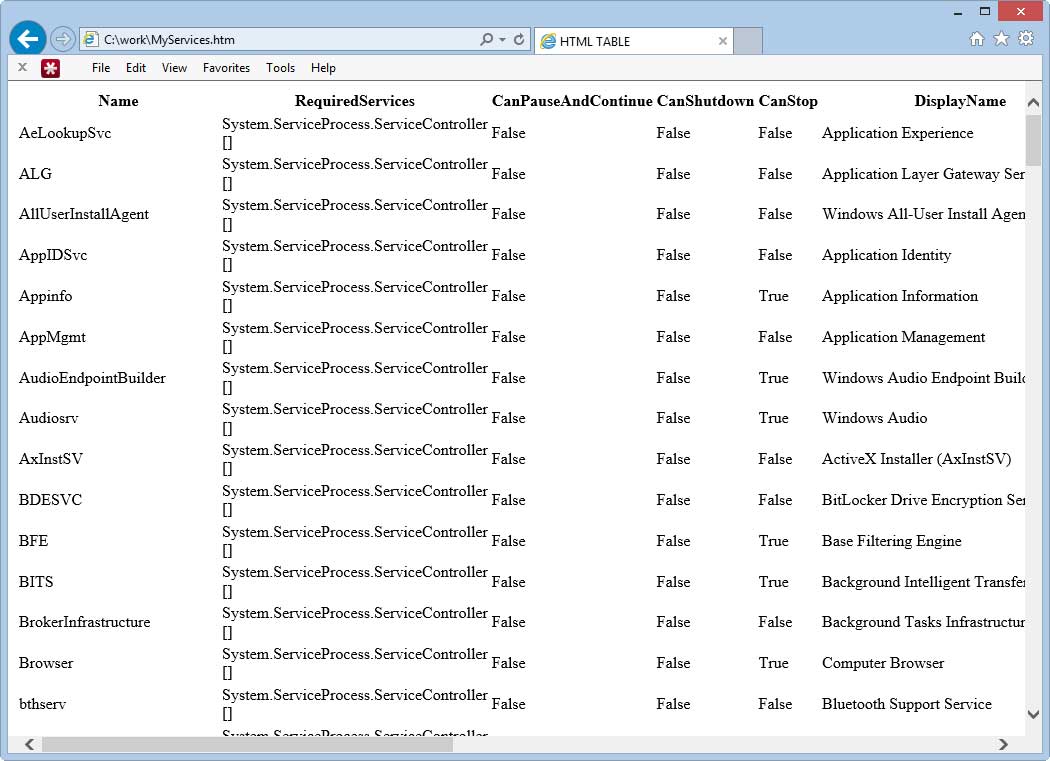 |
Figure 1. The piped results are not so easy on the eyes. (Click image to view larger version.) |
This is because Get-Service is passing the complete object to ConvertTo-HTML. Usually all we need is a subset of these properties:
get-service | Select Name,Displayname,Status,@{Name="ReqServiceCount"; Expression={($_.RequiredServices | Measure-object).count}} | ConvertTo-HTML |
out-file c:\work\MyServices2.htm
Now we get something nicer in Figure 2.
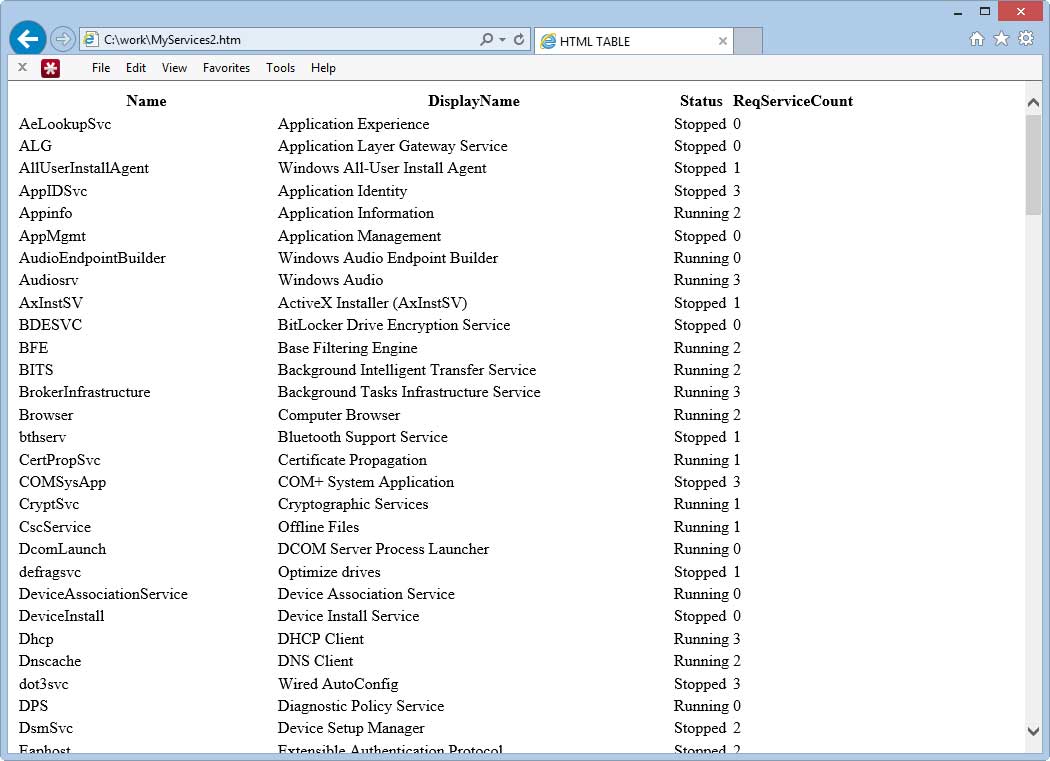 |
Figure 2. The results are easier to read here, but we can take it a step further. (Click image to view larger version.) |
Better. Let's keep at it. It would be nice to include a title, which, as luck would have it, we can specify with the -Title parameter. We can also apply style by referencing a style sheet. The location you specify depends on where and how your file will be viewed. If you are viewing this on your computer, then use a path relative to it. If you are going to view on an intranet, then put the style sheet where everyone can access it. Here's my next iteration:
get-service | Select Name,Displayname,Status,@{Name="ReqServiceCount"; Expression={($_.RequiredServices | Measure-object).count}} |
ConvertTo-HTML -Title "Service Report" -css \\jdh-nvnas\files\blue.css |
out-file c:\work\MyServices3.htm
The results can be seen in Figure 3.
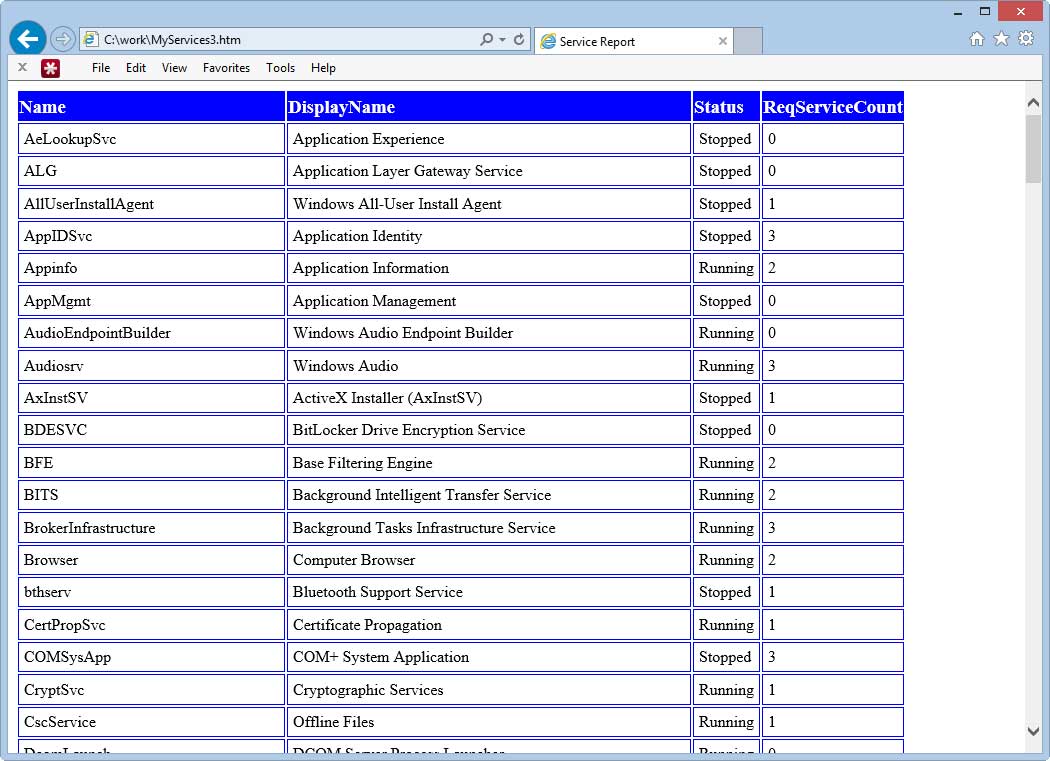 |
Figure 3. Yes, that's much better. (Click image to view larger version.) |
It is also possible to embed the style sheet in the HTML header, although this is a bit more complicated:
$head=@"
<style type='text/css'>
{
font-family:Tahoma, Arial, Helvetica, sans-serif;
font-smoothing:always;
width:100%;
border-collapse:collapse;
}
td
{
font-size:12pt;
border:1px #0000FF solid;
padding:5px 5px 5px 5px;
}
th
{
font-size:14pt;
text-align:left;
padding-top:5px;
padding-bottom:4px;
background-color:#0000FF;
color:#FFFFFF;
}
name tr
{
color:#000000;
background-color:#0000FF;
}
</style>
<Title>Service Report</Title>
"@
get-service | Select Name,Displayname,Status,@{Name="ReqServiceCount"; Expression={($_.RequiredServices | Measure-object).count}} |
ConvertTo-HTML -Head $head |
out-file c:\work\MyServices3a.htm
One thing to watch for with this approach is that you need to put the title in the header code. But otherwise you get the same result and the style goes with the document.
The last bits I want to go over this time are how to insert additional content to the document. Remember, the input objects are turned into a table. However, you can also insert text before and after the table using the -PreContent and -PostContent parameters. Well, technically what you are inserting is HTML code, but let's not quibble. Here's what it looks like:
get-service | Select -first 10 | Select Name,Displayname,Status,
@{Name="ReqServiceCount";Expression={($_.RequiredServices | Measure-object).count}} |
ConvertTo-HTML -Title "Service Report" -css \\jdh-nvnas\files\blue.css -PreContent "<H3>Daily Service Report</H3>" -PostContent "<i>Report run by $($env:username)</i>"|
out-file c:\work\MyServices4.htm
I only grabbed the first 10 services so you could see the pre/post content in Figure 4.
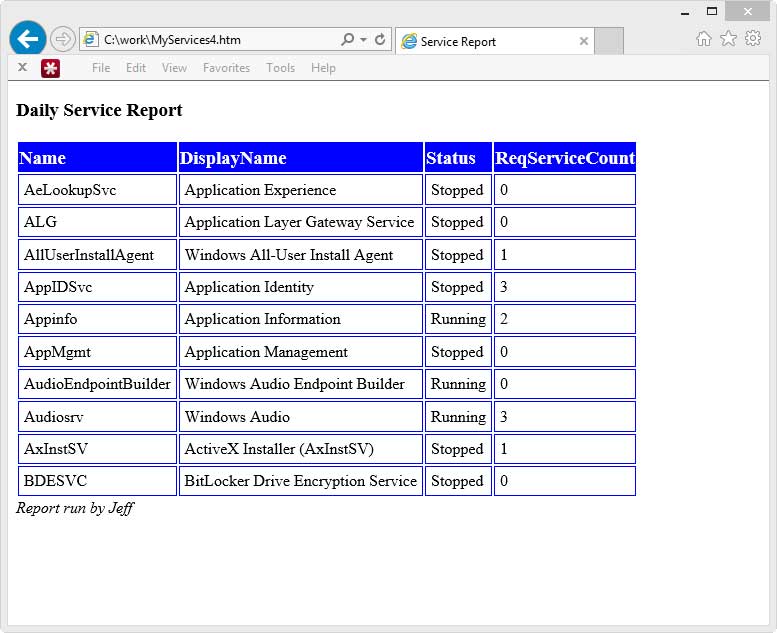 |
Figure 4. A simple HTML report showing the first 10 results with some descriptive text before and after the table. (Click image to view larger version.) |
The main point to remember with ConvertTo-HTML is to control what properties you want to display and send the results to a text file. But what if you don't want a table? Or what if you want several tables in the same document? We'll cover that in the next lesson.
About the Author
Jeffery Hicks is an IT veteran with over 25 years of experience, much of it spent as an IT infrastructure consultant specializing in Microsoft server technologies with an emphasis in automation and efficiency. He is a multi-year recipient of the Microsoft MVP Award in Windows PowerShell. He works today as an independent author, trainer and consultant. Jeff has written for numerous online sites and print publications, is a contributing editor at Petri.com, and a frequent speaker at technology conferences and user groups.