PowerShell Pipeline
Exploring Hyper-V with PowerShell
Extend virtual environments with these helpful cmdlets.
If you are using Hyper-V as your virtualization solution, then you should absolutely be familiar with the Hyper-V module that is available to use. If you are not familiar with it, then you are in luck as I will show you some of the more useful cmdlets to better take stock of what is going on in your virtual environment!
I wouldn't think of this as a top 'n' list of cmdlets but more of an awareness of what cmdlets you should probably have in your back pocket to use when you need specific information about your environment. With that in mind, we won't actually be building out any virtual machines in this article. The first thing that you will need to do is import the Hyper-V module using Import-Module. Quick note: I am running the Hyper-V module on Windows 10 using PowerShell V5.1 (5.1.14393.103).
Import-Module –Name Hyper-V
With that done, we should see just how many cmdlets are available to use within this module.
Get-Command -Module Hyper-V | Measure-Object
 [Click on image for larger view.] Figure 1. 232 cmdlets available in the Hyper-V module.
At 232 cmdlets, this is a pretty large module and list out all of the cmdlets, even as an image would be quite a bit to go through. Ok, let's start exploring our Hyper-V environment to see what we are actually working with!
The first cmdlet that you might want to run is Get-VMHost to see more info about our hosting server. There isn't a lot to this cmdlet besides a computername and a credential parameter. If you are running this command on the Hyper-V host, then you can run the cmdlet as is without specifying a parameter to get back information.
Get-VMHost
What you get back is a little bit of information, but to really show everything you should pipe the objects out to Select-Object and specify a '*' to show all of the properties.
Get-VMHost | Select-Object -Property *
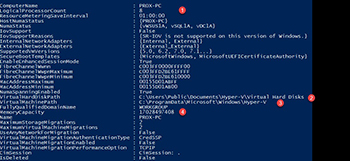 [Click on image for larger view.] Figure 2. Looking at the output of Get-VMHost.
A couple of useful properties here:
- The maximum CPUs on this host
- Default location of the virtual hard disks
- Default location of the virtual machine files
- The maximum memory on this host
We know what the host has for configurations, but what about the virtual machines themselves? That is our next thing to review and we can do this using the Get-VM cmdlet. Calling the command without parameters will bring back all of the virtual machines both online and offline.
Get-VM
 [Click on image for larger view.] Figure 3. Viewing the output from Get-VM.
Right off the bat we have some useful information available in its default table view. We can see the CPU usage as well as how much memory is assigned to the virtual machine. Another nice touch is being able to see the system's current uptime and we round it out with the current status and version of the virtual machine. Now, if we wanted some serious information, we can continue our approach by forcing all of the properties to be displayed and see what we get.
Get-VM vDC1A | Select-Object -Property *
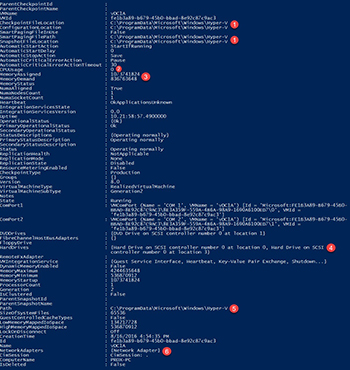 [Click on image for larger view.] Figure 4. Extended output from Get-VM.
Noting a few key areas to look at with the virtual machine object:
- Locations of the checkpoint, configuration and snapshot files
- The current CPU usage of the virtual machine
- The currently assigned memory from the host to the virtual machine as well as the current demand of memory from the virtual machine
- List of connected hard drives to the virtual machine
- Path of the virtual machine file
- List of connected network cards
I mentioned the hard disk and network cards being listed, so let's dive into the virtual machine object and see what is in each of these nested objects. First up is the hard drives:
$VM = Get-VM -Name vDC1A

  $VMHDD = $VM.HardDrives


  #OR

$VMHDD = Get-VM -Name vDC1A | Get-VMHardDiskDrive
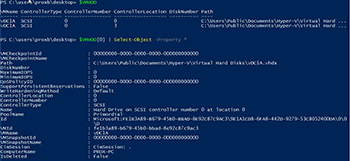 [Click on image for larger view.] Figure 5. Investigating the hard disks on a virtual machine.
Here you can see more information about the hard drives such as their path location on the Hyper-V host and their controller number and location.
Up next is the network cards under the NetworkAdapters property.
$VM = Get-VM -Name vDC1A

  $VMNIC = $VM.NetworkAdapters
#OR
$VMNIC = Get-VM -Name vDC1A | Get-VMNetworkAdapter
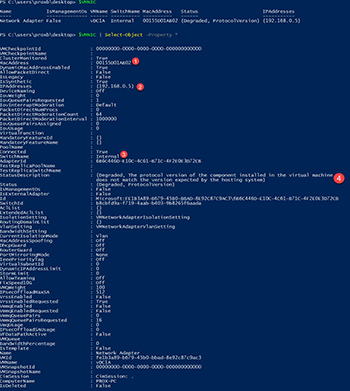 [Click on image for larger view.] Figure 6. Reviewing the network adapter settings on a virtual machine.
There is a ton of information here in the network adapters object. While there is some useful information for everyone, I am mostly focused on the following items:
- MAC address of the network adapter
- IP address of the network adapter
- The switch that the network adapter is using
- The current status of the network adapter along with a status description
As well as viewing the host and virtual machine configurations, we can take a look at the state of any snapshots which happen to exist at the moment. We can quickly check all virtual machines by taking the objects outputted by Get-VM and piping them directly to Get-VMCheckpoint to see what shows up. In case you are curious, starting in Windows Server 2012 R2, snapshots were renamed to checkpoints and this is noted with additional cmdlets that provide the same information as their *Snapshot cmdlets.
Get-VM | Get-VMCheckpoint
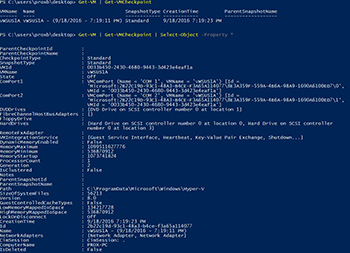 [Click on image for larger view.] Figure 7. Viewing the state of a checkpointed virtual machine.
In this case we only had a single virtual machine that has been snapshotted and upon a deeper inspection, the object is the same as what we saw using Get-VM.
After reviewing your Hyper-V virtual environment using these cmdlets within the Hyper-V module, you can quickly and easily put together some reports to map out your environment as well as using this information to potentially troubleshoot areas of concern. In the next article, we will look at building and adding additional configurations to a virtual machine in the Hyper-V environment.
About the Author
Boe Prox is a Microsoft MVP in Windows PowerShell and a Senior Windows System Administrator. He has worked in the IT field since 2003, and he supports a variety of different platforms. He is a contributing author in PowerShell Deep Dives with chapters about WSUS and TCP communication. He is a moderator on the Hey, Scripting Guy! forum, and he has been a judge for the Scripting Games. He has presented talks on the topics of WSUS and PowerShell as well as runspaces to PowerShell user groups. He is an Honorary Scripting Guy, and he has submitted a number of posts as a to Microsoft's Hey, Scripting Guy! He also has a number of open source projects available on Codeplex and GitHub. His personal blog is at http://learn-powershell.net.