PowerShell How-To
Configure Windows Deployment Services Using PowerShell
WDS can be set up via the traditional GUI, but what if you're in an enterprise and have a lot of WDS servers to set up? In that case, PowerShell is a great way to automate the process.
- By Adam Bertram
- 12/13/2018
Windows Deployment Services (WDS) is an excellent way to provision and deploy the Windows operating system to tens, hundreds or even thousands of computers at once.
WDS allows administrators to perform a network boot on remote computers, which then automatically begins the deployment of Windows. This means no more sneaker-netting with a thumb drive!
WDS can be set up via the traditional GUI, but what if you're in an enterprise and have a lot of WDS servers to set up? Perhaps you're a consultant and need a standardized way to set up a WDS server at various clients? In that case, PowerShell is a great way to automate the process.
In this article, let's go over how we can perform an initial setup and configuration of a WDS server with PowerShell.
To get started, we'll first install the Windows feature WDSDeployment on our soon-to-be WDS server. Be sure to include the management tools to get the WDS MMC and PowerShell module.
Install-WindowsFeature wds-deployment -includemanagementtools
We can see the command completed successfully, and a reboot is not required.
 [Click on image for larger view.]
Use the WDS command-line utility to initialize the server. Specify where you would like your remote install to be. Best practice is to use a separate partition. I am placing the command output in a variable because it can spew out some unhelpful warnings. Just ensure that the last line says, "The command completed successfully," and you know your WDS server is up and running.
$wdsUtilResults = wdsutil /initialize-server /remInst:"E:\remInstall"
$wdsUtilResults | select -last 1
Next, we need to add a boot image and at least one install image before we can really do anything with it, so let's import the boot.wim. I will specify the path to the Windows 10 ISO mounted on our WDS server. This can take 30 seconds or so to import. Next, we will import the install image. This is the image that will actually be deployable after we are done.
Import-WdsBootImage -Path "D:\sources\boot.wim"
We should create an image group to store it in. This can be named whatever you want, but you will want to logically group your images somehow. I will call my group "desktops."
New-WdsInstallImageGroup -Name "desktops"
A WIM on an install media can have several images on it. We can use the Get-WindowsImage command to list the images.
Get-WindowsImage -imagePath "D:\sources\install.wim" | select Imagename
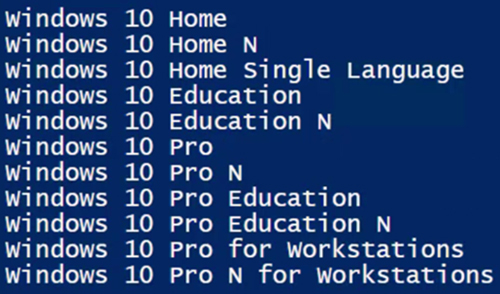
Then use the image name we want to import with the Import-WDSInstallImage command.
$imageName = 'Windows 10 Pro'
Import-WdsInstallImage -ImageGroup "desktops" -Path "D:\sources\install.wim" -ImageName $imageName
This import will take much longer because it's a full operating system image.
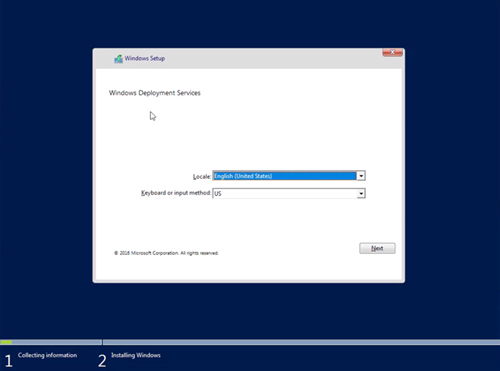
At this point, our WDS server is ready to test. You can either configure PXE boot or create and use a discovery image to test. I'll boot to an image I already made on our test machine. After our discovery media boots, we can select our language and type our administrative password.
 [Click on image for larger view.]
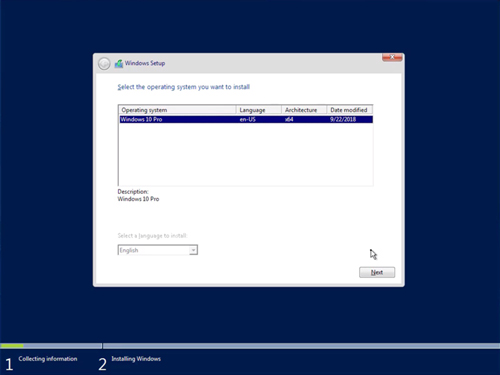
Once the language is selected and the administrator password is input, we are now ready to deploy our Windows image.
 [Click on image for larger view.]
About the Author
Adam Bertram is a 20-year veteran of IT. He's an automation engineer, blogger, consultant, freelance writer, Pluralsight course author and content marketing advisor to multiple technology companies. Adam also founded the popular TechSnips e-learning platform. He mainly focuses on DevOps, system management and automation technologies, as well as various cloud platforms mostly in the Microsoft space. He is a Microsoft Cloud and Datacenter Management MVP who absorbs knowledge from the IT field and explains it in an easy-to-understand fashion. Catch up on Adam's articles at adamtheautomator.com, connect on LinkedIn or follow him on Twitter at @adbertram or the TechSnips Twitter account @techsnips_io.